Upgrade MaixPy firmware
1. Connecting the board
Connect the Type C cable, one end to the development board, one end to the computer.
2. Install driver
Install driver as described above
3. Get the upgrade tool
- Download kflash_gui and you will get a zip file.
kflash_gui is cross-platform, it can work on multiple systems (including Windows, Linux, MacOS or even Raspberry Pi)
Extract the downloaded file to a folder, then double-click kflash_gui.exe to run the app.
- Or use terminal tool
pip3 install kflash
kflash --help
kflash -p /dev/ttyUSB0 -b 1500000 -B goE maixpy.bin
4. Get firmware
- The release version of the firmware is downloaded from the GitHub page
- The automated builds can be downloaded from here
Firmware files have the .bin or .kfpkg extension
You can pack kfpkg file with kflash_gui, or manually according to this kfpkg doc
Firmware naming instructions:
maixpy_v*.bin: Full version of MaixPy firmware (MicroPython + OpenMV API etc.)maixpy_v*_with_lvgl.bin: MaixPy firmware, with LVGL version. (LVGL is an embedded GUI framework, you need to use when writing the interface)maixpy_v0.3.1_minimum.bin: MaixPy firmware minimum set, not supported ´byMaixPy IDE, does not contain OpenMVrelated algorithmsface_model_at_0x300000.kfpkg: Face model, placed in address 0x300000, can be downloaded multiple times without conflictelf.7z: elf file, ordinary users do not care, used for crash debugging
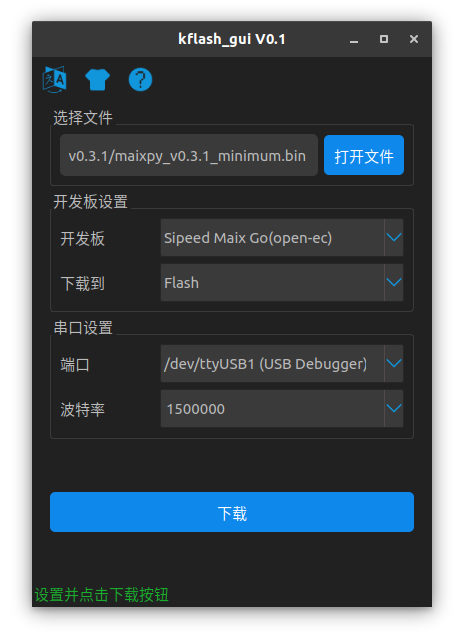
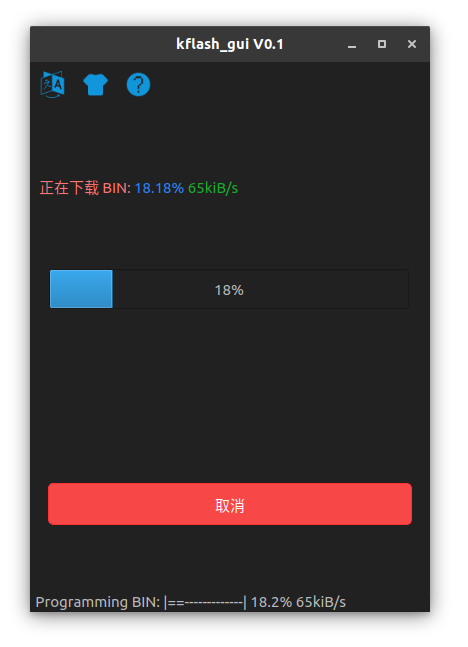
5. Upload firmwre to the development board
Open
kflash_guiSelect the firmware, set the options and then click to download. For more features, or instructions on how to use the tool, check the kflash_gui project page
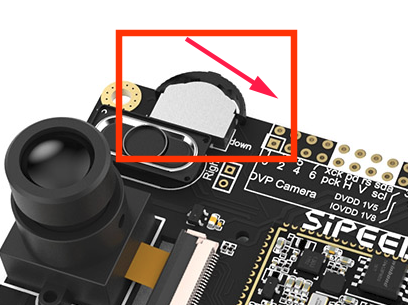
For the early
Maix Go, if the download fails, try holding the three-phase dial to thedownlocation during the download procedure.